Mum-making step by step
September 20, 2016
Step 1: Gather your supplies. Most craft shops such as Hobby Lobby and Michaels carry everything you need to make a mum.
Suggested supplies:
-Fake Chrysanthemum flower
-Mum backing
-Ribbons in your school colors in varying sizes and fun ribbons representing activities you are in and football
-Decorative pieces depending on your personality
-Hot glue gun
-Stapler
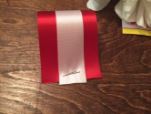 Step 2: Start by cutting two large ribbons and four small ribbons of two different colors into strips that measure about 5 inches in length. These will form the looped ribbon that goes around the mum flower.
 Step 3: Staple one of your smaller ribbons to the next size up ribbon on both sides so they lie flat on top of each other. Then staple the ribbon into a loop. You will need to make approximately 6 of these loops for the top of your mum. You will also need to staple the extra small strips into loops. You will also need about 6 of these, and they will go in between your multi-ribbon loops.
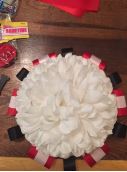 Step 4: Attach the ribbons around the mum backing alternating between the large loops with two ribbons and the small single ribbon loop. The ribbons can be attached with hot glue or staples depending on your preference.
Step 5: After the ribbons have been placed you can now attach the mum flower, by placing the stem through the hole in the backing and hot gluing the flower into place.
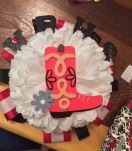 Step 6: If you wish to add any decorations to the top of your mum do so now. Many people include something that represents their school in the middle of the mum flower, like a mascot. After you have finished decorating the mum flower place it to the side to return to later.
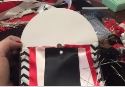
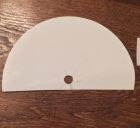 Step 7: Take a second mum backing and cut it straight across about half way through the circle. You will use this as the base to form your mum.
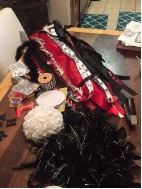
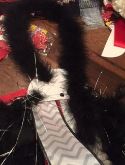
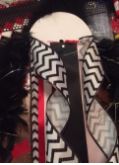
 Step 8: Starting on the outside of the backing begin placing ribbons on both sides, allowing the ribbons to overlap and form the base. After you have a base attach a large feather boa to the sides. This is best done by cutting the boa in half and hot gluing each half to one side of the backing.
 Step 9: Using a small feather boa make a ‘necklace’ to hold up the mum. You will need to cut the boa into a strip that once attached will fit comfortably over your head. This will prevent you from having to safety pin your mum to your shirt and risk ruining it. Attach the boa loop to the mum backing using hot glue.
Step 10: Now that you have the base of your mum made, it will be easier to work on if it is hung up. You can hang your mum using the boa necklace.
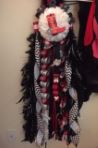
 Step 11: Start attaching more ribbons to the mum using hot glue. You can use as many or as few as you like. If you have a ribbon that you really like, save them till last and attach them in the front for everyone to see!
Step 12: Finally add on any decorative items. These can be glued or tied onto ribbons.
 Step 14: Now grab the mum flower you created earlier, it’s time to attach it to the ribbons. Attach the backing with ribbons to the mum flower, using hot glue.
Step 13: Once you are satisfied with the appearance of your mum, take a third mum backing and staple/hot glue it on the back, to prevent any snags on your clothes from staples.